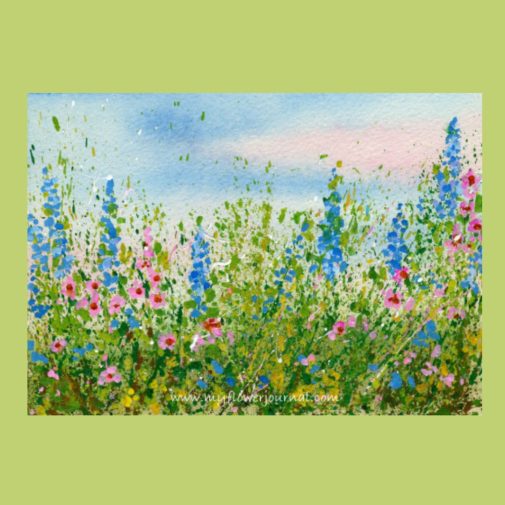
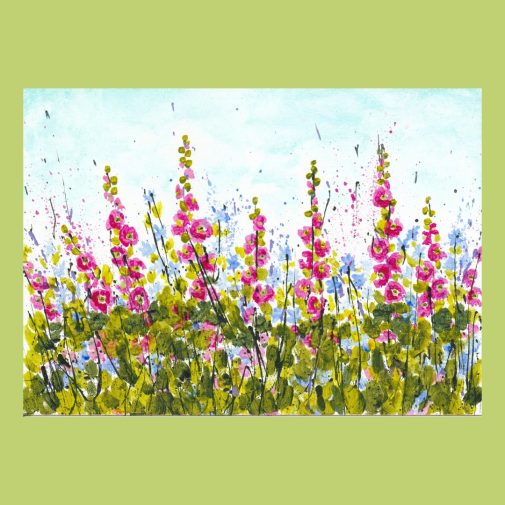
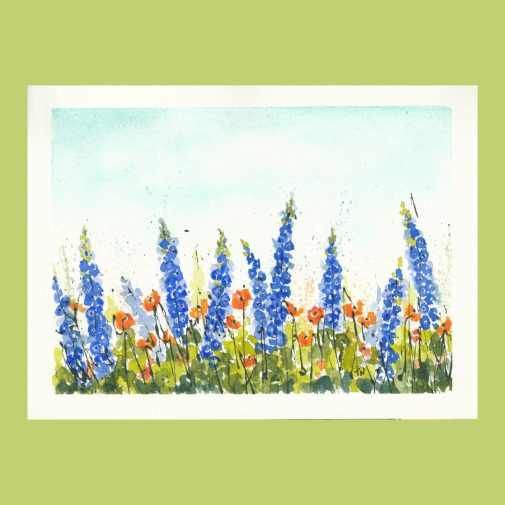
You can create a splattered paint flower garden. No drawing is needed just lots of spontaneous fun for all ages and skill levels. Each one turns out different depending on the color of paint you use and the amount of splatters you do.
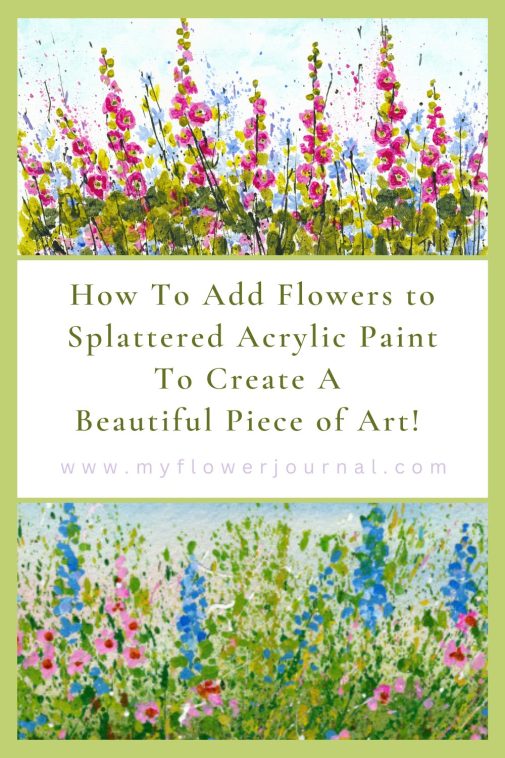
Splattered Poppy Field Painting
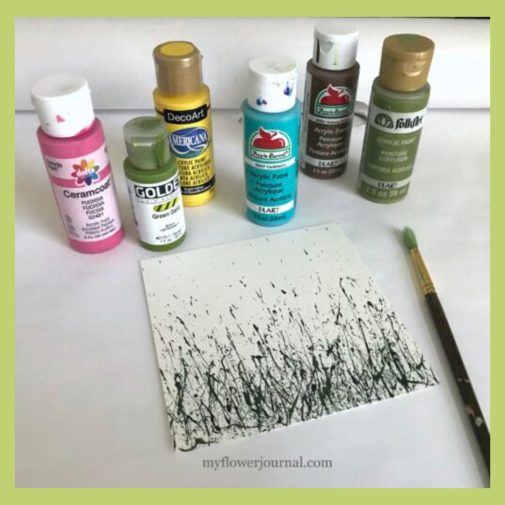
Supplies: Watercolor paper, watercolors and fluid acrylic paints, masking tape, ruler, paper towel, round bristle brush (The brush I use is no longer available on amazon. I will need to find anther one and put it on my supply page.), disposable plastic table cloth or something to protect your work area from paint splatters.
You can read more about the Martha Stewart paint and colors I use here.
I also like to use Golden Fluid Acrylics.
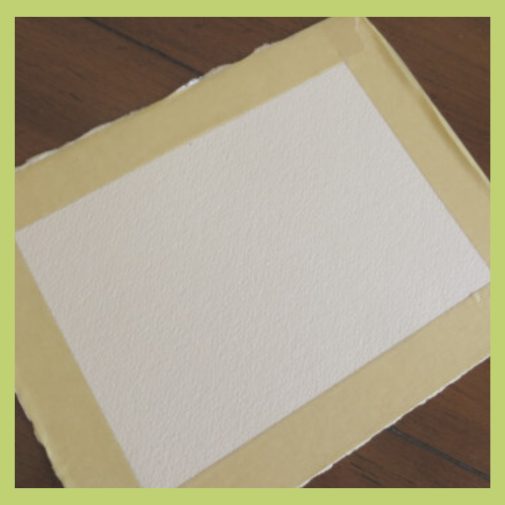
I like my watercolor paper to be 2 inches larger than the finished size of painting I am doing. The paintings in this demo are 5″x7″ so the paper is 7″x9″. This gives a nice 1 inch border all the way around. Draw a 5″x7″ rectangle on the center of the paper. Mask the border by placing masking tape on the pencil lines of the rectangle. I like to do several paintings while I have everything out. Some turn out better than others so its nice to do more than one.
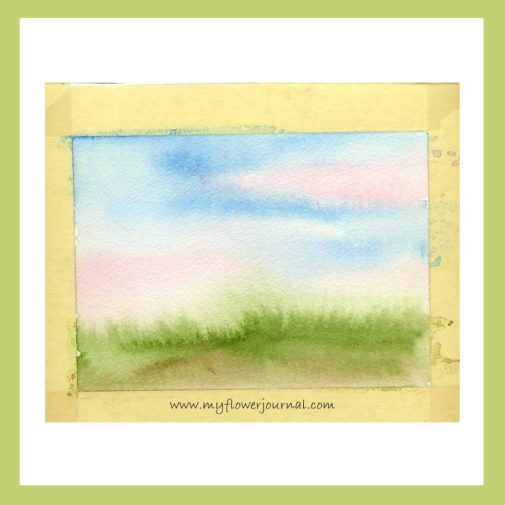
Wet the paper with clean water then paint the sky leaving white for clouds. Decide on a horizon line somewhere below middle of paper and paint the ground. Watercolors dry light so paint your sky and ground darker than you want. Don’t worry if its not perfect. Most of it will be covered up with splatters. Let it dry completely.
While the watercolor background is drying get everything ready for splattering. Wear old clothes or an apron. Cover your work surface. Have plenty of paper towels ready to use. Choose the paint colors you are going to use. Make sure you have a variety of light, dark and medium greens, some brown, a few flower colors and white. You can use inexpensive fluid craft acrylics or Golden Fluid Acrylic Green Gold. Use plenty of paint. A brush filled with lots of paint produces the long grass like splatters, with less paint you get fine speckled splatters.
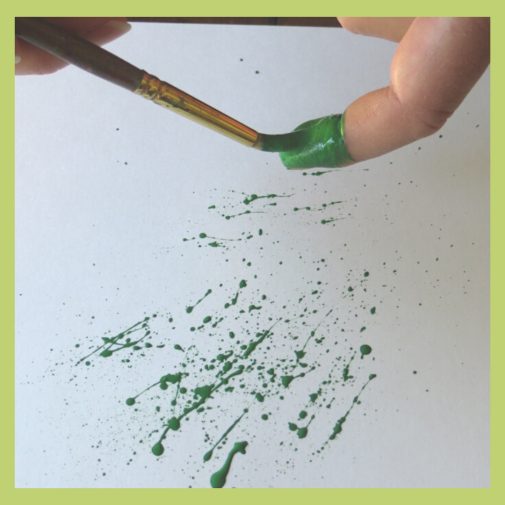
Practice making splatters using liquid acrylic paint on some scratch paper. Load your brush with paint and flick it across your index finger. Try holding it close to your paper and farther away to see how the splatters change.
A video showing how I splatter my paint and FAQ can be found here.
Use a paper plate to put your acrylic paints on.
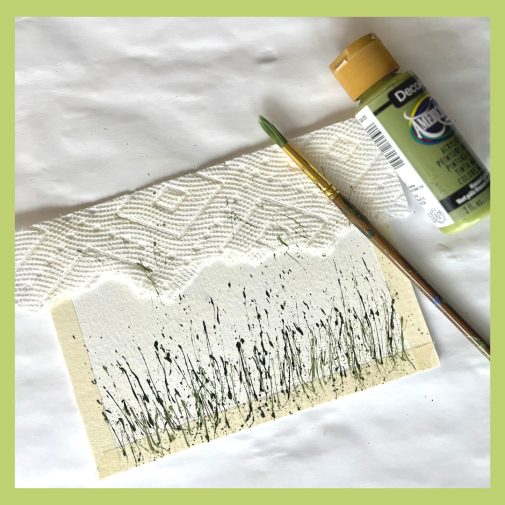
When you are confident with your splatter technique and your watercolor background is dry start splattering with brown acrylic paint near the bottom of your painting. Continue to add splatters of different green shades.
You may want to cover part of the sky with paper towel so it doesn’t get too many splatters on it. Tear the paper towel uneven so it has a more natural look. Splatter until it looks like a grassy field. My piece of paper towel in this sample has a butterfly and pink writing on it and blends in with the painting, but its there if you look close.
Make sure the splatters at the bottom are darker and heavier. Then add a few flower colors and white. You will add more flowers after this step dries.
After the grassy splatters are completely dry use a small brush and add dabs of flower color using your acrylic paint. Keep it random and spontaneous looking. Don’t try to paint detailed flowers, just an impression. Stop before you over do it.
After the painting is totally dry you can peel the masking tape off. It is so fun to see the finished results.
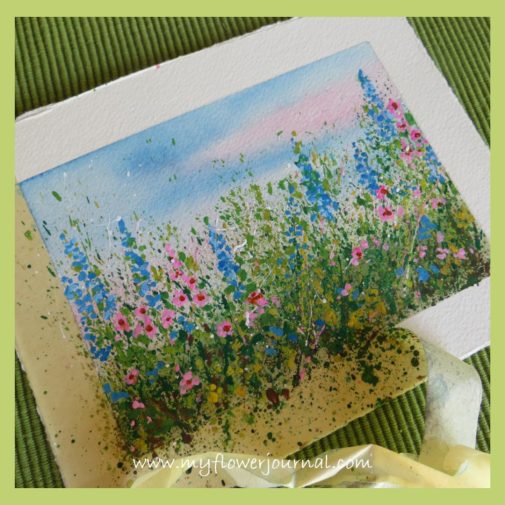
You can also do splatters on a gesso board instead of watercolor paper and use acrylic paint to create the sky and ground under painting. Enjoy your splattered paint flower art!
As an Amazon Associate I earn from qualifying purchases. Many posts on my site contain Amazon affiliate links. I only share products I use and like. I make a small commission if you make a purchase through these links. I helps keep My Flower Journal running at no extra cost to you!
How to make splattered paint cards here.
More splattered paint flower art ideas here.
Video and FAQ here.
Sharing at Wow Us Wednesday, A Stroll Thru Life, My Romantic Home, Brag About It Tuesday, Finding the Pretty and Delicious, Whatever Goes Wednesday, Create It Thursday, Make-It-Yourself Monday, Get Your Craft On, Mad in Crafts, Monday Funday, Time to Sparkle, Anything Blue Friday, Craft O Maniac, Amaze Me Monday, Two Girls and A Party, Pin It Thursday, Paint Party Friday, Pin Me Linky Party, Tutorials, Tips and Tidbits
Such a great post! Love it!
Thanks Cassidy! Its so much fun I am doing a few more today.
This post tops them all, and they all of have been top notch. I can’t wait to try this. I had a cleaning binge and threw out my old, half empty bottles of acrylic paint from my tole painting days. Should have kept them!
Thanks Allison! It is a fun art project. Its addicting-you can’t do just one.
[…] your own splatter art garden with this tutorial from My Flower Journal. This looks hard but it is crazy easy! Practice a little bit and make a […]
What kind of brush do you recommend? Thicker? Thinner? Long? Short? Thanks!
This is so fun! I featured your craft on my blog’s weekly inspiration post! http://thenotsosecretlifeofbee.wordpress.com/2013/06/07/be-inspired-2/
Thanks Becca for featuring my splattered painting on your blog! I keep doing more and more splattering. I have some more splattered painting ideas I’m going to share next week. I enjoyed looking at your blog. Lots of inspiration and creative ideas!
These are so fun! My girls (Evelyn and Miriam) were so happy to see your picture at the top of the page. “Is that Cassidy’s mom? Tammy?”
Thanks Laura! I am so impressed your girls remembered me. Would love to see all of you again.
Lovee! ♡ Thankyou so much for posting! ~
What a cool idea! Thanks for sharing!
This was wonderful!! I am so excited to share this Tutorial with everyone and I love your work! So excited!
Love your tutorial this week and the watercolor turned out so beautiful!
Thanks for sharing on the BeBetsy BRAG ABOUT IT. And for the LINK back to BeBetsy. -xo
Sharon and Denise
Fashion | Food | Beauty | Out & About | Morning Coffee
Follow us:
Facebook ~ Twitter ~ Bloglovin ~ Pinterest
I love this! I’ve pinned it and can’t wait it try it!
xo
What a fantastic tutorial. Very impressive splatter technique and a beautiful way to celebrate SOC. Thanks for showing us the way!!
Beautiful painterly work – reminds me of Redon. Gorgeous colour too.
I clicked on your link from the “Summer of Color” blog, and, WOW…I am so AMAZED!
Your work-of-art is simply BEAUTIFUL, and your tutorial is FABULOUS!
I just HAD to leave you a comment. Thank you for sharing your work!
Another beauty and love the step by step!
Lovely splatters!! I love splatter painting!!
LOVE LOVE LOVE this each week. STUNNING!!
Beautiful, vibrant and with a great summer atmosphere! Love this technique! <3
Gorgeous!
WOW!!. I LOVE seeing all the flower fields you created the last few weeks, and now I learned how you did it. I’m in awe to say the least :). I love the spontaneity of the design, the amazing detail and the layers of colors!!. Bravo!.
These are incredibly beautiful! What a wonderful technique.
Love the flowers and loooove the splatters!!!
xx
you make it look so easy!! to get the transparency you achieve is not an easy thing, thanks so much for sharing.
This is fantastic, and just what I needed, a tutorial to point the way! Thank you so much. I am going to try this, this week. You are wonderful! ~ kath
So beautiful!!! I love what you did with this week’s SOC colors. And thank you so much for showing us how you make these amazing works of art!
This is beautiful! I love the spontaneous way you created this painting! Beautiful!
I always do this to the coffee cans that end up being designated as outside ashtrays…
This is beautiful, I especially love that pop of yellow in the middle of the background, just gives a beautiful summer light to the piece. Stunning work. :)
Thank you so much for this tutorial! I followed your instructions and posted my creation on my blog, with kudos to you of course :) http://decidedlysimple.blogspot.com/
Thank you! Your tutorial was great. Will give it a try and Happy PPF
This is just delightful, Tammy! It’s like a melding of Monet and Seurat! Your tutorial and process images are wonderful.
Love these flowers plus the colors!
Love your arts! Hopping from Diana’s link up. Pinned this! Thanks.
How fun is this! Sweet tutorial. xox
I couldn’t share this in FB because of its privacy settings. Please tell me if you have set to public already. Thanks.
This looks great! thanks so much for sharing the technique!
Wow, so very pretty! I would love to try this. Thanks so much for sharing at Amaze Me Monday…
Blessings,
Cindy
Absolutely gorgeous! Thanks for linking to my Pin Me Linky Party.
Thanks for the tutorial, you are so talented!
Splattering is wonderful way to paint flowers. Yours are very fresh and beautiful. Thank You for tutorial.
Greetings from Finland :-)
This is a perfectly wonderful technique! Thanks for the clear tutee. I can’t wait to try this on my own. Your results are beautiful.
Gorgeous! Thanks so much for sharing with us!
Love this painting and technique. Thanks for sharing :)
Congratulations on being featured at Paint Party Friday. I love the impressionistic feel of your flower field. Blessings!
Tammy, this is awesome. Your paintings are beautiful and I love, love, LOVE your tutorial. I definitely want to try this. And I am most definitely becoming a follower of your blog. Thanks bunches. BTW, I found you through the spotlight on Paint Party Friday. Congratulations. I’m so glad you were chosen.
Blessing hugs,
Teresa
Beautiful, fun artwork Tammy. Thanks for sharing.
Beautiful! Thank you so much for sharing.
Wonderful splattered watercolo image!
Thank you for sharing your tutorial. It inspired me to create this on my iPad. :)
http://thymeformom.blogspot.ca/2013/08/wildflowers.html
Just found your blog and love your tutorial. I can’t paint at all and would love to try your tutorial. If you decide to do another tutorial I would love to know how you make the backgrounds of your art. Thanks for posting your beautiful work.
I have done this before and had forgotten how awesome it can look. I have just decorated a bedroom and I think I will do a picture like this in blues. Thank you for the reminder. I usually work in watercolour but think I will go with acrylics.
Great demo
Janice
This is beautiful! I’m definitely going to be trying this in the future =D Thanks for sharing!
[…] Tammy Northrup, who has a lot of splattered paintings similar to the one she highlights in her tutorial I […]
I did a painting on canvas for my friend using this technique and she loved it! Thank you for sharing this tutorial Tammy! It was fun and easy and therapeutic to do!
https://lingsparkles.wordpress.com/2014/10/25/lavenders-blue-dilly-dilly-acrylic-on-canvas/
Hy, Nice post
Our visit :Flowerstudio
Thanks super helpful
Hi there, Do you sell your paintings?
I don’t at this time, but thanks for your interest.
I just want to say thank you! I’ve wasted hundreds of dollars and countless hours trying to achieve this exact effect for grass. Found your post a few days ago and I’ve finally got it! Thank you so much for sharing your methods!
If anyone’s interested, I was able to get thicker, longer grass blades (for a large canvas) with a Winsor & Newton University Series 233 #12.
Again, thank you!!!
I’m glad my post was helpful!
Its a great pleasure reading your post, Tammy. Its full of information I am looking for and I love to post a comment that “The content of your post is awesome” Great work.
Many art lovers prefer Beautiful Garden of Flowers (Floral paintings owing to their vibrant and jubilant colours. They are extremely sophisticated and lovely to observe. Amidst other paintings, a floral painting can easily capture the attention of art lovers. I recently Bought Floral Paintings from IndianArtZone . They are of high-quality and are painted meticulously by talented artists. I would suggest you for Contact them to know more.. Keep up the good work!!